We never know how much of an important role our computers play in our daily
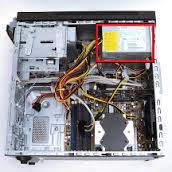
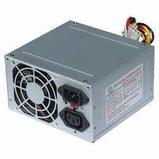
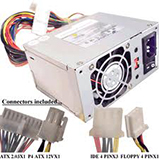
lives until we run into a system crash. In a recent post we discussed troubleshooting a machine that would not power on. Follow this Link: Computer Won’t Turn On or Computer Will Not Power On. Today we will discuss exchanging or swapping out an old power supply for a new one. As every computer is different the hardest part will most likely be opening the computer case. Once the case is open we will need to locate the power supply. Note: the images above.
Now once we have located the power supply follow the steps below in order to exchange your power supply.
STEP 1 Make sure the new power supply’s will fit and that the cable connections match.
Most motherboards of today use a ATX 20 or ATX 24 pin for it's main power connectors the 24 pin is most popular. Power Supplies also use a ATX 4 - ATX 6 or ATX 8 pin power connector. The ATX 4 - 6 or 8 pin connectors are used to provide +12 VDC to the processor voltage regulator with the 4 pin being the most common.
STEP 2 Disconnect the power connections from the motherboard.
Two power supply connections plugged directly into the motherboard needs to be disconnected. The ATX 20, or 24 pin and ATX 4, 6 or 8 pin.
STEP 3 Disconnect the power connects to the CD/DVD drives and hard drives.
Your power supply will have connections connected to the CD/DVDs as well as any hard drive you may have installed. Disconnect these connections.
The power supply will most likely have connections that are not connected to anything these connection are usually used for upgrades.
| Sponsored Links 911 Computer Support & Repair Computer Repair in Fort Worth is a phone call a with 911 Computer & Repair. www.911Computer Support.com Plan It Deals Daily Deals that specialize in Family Events discounted services. www.PlanItDeals.com |
STEP 4 Remove Screws from power supply.
The power supply will have four screws connecting it to the machine remove the screws from the machine. Some power supplies have an additional clamp or connection holding it in place the power supply may need to be detached from this connection.
STEP 5 Remove the Power Supply
Remove the power supply from the computer case, sometimes this may take a little wiggling and moving of wires but keep trying you will get it.
STEP 6 Place the new power supply in the case in the same position as the old power supply.
Secure to power supply to the machine with the four screws we removed earlier. Reconnect the 20, or 24 pin power connector and the 4, 6 or 8 pin power connection. Reconnect any CD/DVD rom's as well as any hard drives that may be installed in the machine. Don't forget some cable won't have anything to connect to, this is for future upgrades.
STEP 7 Power on the machine.
Plug in the power cord and turn on the machine. Your computer should power up without issues, if so pat yourself on the back and relax your have Successfully changed your defective power supply for a new one.


 RSS Feed

